
When you are planning to blog, the very first thing after deciding on a niche is choosing the CMS. Whether you are a beginner or not, choosing a good CMS is important. Have any idea why? It is all about your blog user satisfaction. On the other hand, yes! it should be easy for you to handle. No matter what stage you are at, Squarespace is a good choice. According to Squarespace, there are one million users use Squarespace around the world. If your choice is Squarespace, this is the best and very descriptive guide for you to learn how to create a blog with Squarespace.
1. Setting Up a Squarespace Account
This is the very first thing that you need to do before creating a blog with Squarespace. For that purpose, simply follow the following steps.
First, visit the homepage of Squarespace. You will see the homepage as shown below in the image.
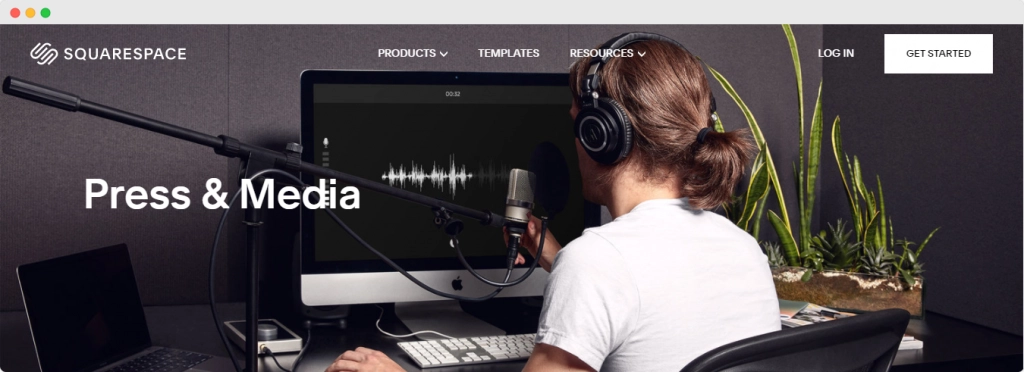
Second, click the "Get Started" button on the top right corner of the homepage. If you already have a Squarespace account, just click "Log In". You will see the signup/login pages according to what you have selected.
Choose one of the given login/signup methods which fit the best for you among what they have given.
2. Choosing a Template
After creating an account, you will be redirected to the dashboard of your account.
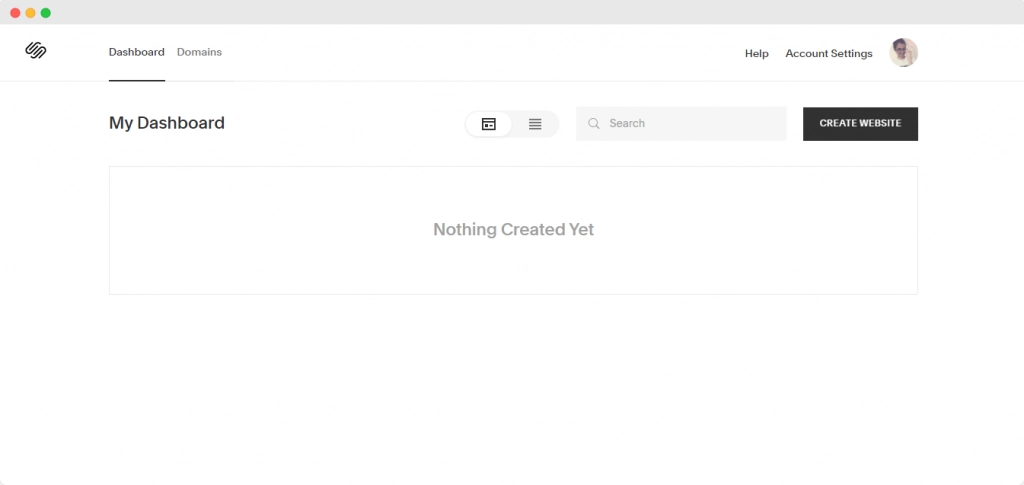
Click "Create Website". After that, you will see a series of questions regarding the blog that you are going to create as shown below. Ex: What is your site about?
Answering those questions is not compulsory. You can either answer or skip the questions.
3. Choosing a Suitable Template
Then, you will be redirected to the Squarespace page. From there, you can see three different labels on the top of the page named Products, Templates, and Resources respectively. Hover on "Products" and select Blogging under Create A Website heading in the drop-down menu. Then you can see the Start a Blog page as shown below.

Click Get Started or Browse Templates- whatever you like as both direct you to the same place.
There are plenty of templates that Squarespace has given. You can preview each template before choosing one. In the preview mode, for your ease, Squarespace has given you three modes for you to check each template- those modes are Computer Screen, Tablet Screen, and Mobile Phone Screen respectively. Follow the above video clip to get a better experience.
Note
Not only the above path leads you to choose templates, but also you can do it as shown in the video below just after answering the questions mentioned above. There is one more thing that you need to set the blog template filter to "Blog" under the heading called "Type".
Finished checking the templates? Have an idea which template to choose? Here you go. Click "Start With X" to go further in designing your blog with the template that you have chosen. If you are in the preview section, just stay right there. No hovering in the template section is needed. Just click on "Star With This Design" on the top right corner of your screen. That's all.
Here are some points to remember,
Choosing a suitable template is much important for your blog's success.
Use filters to narrow your search, but feel free to pick a template outside your category.
Find a template that meets most of your content needs to reduce customization time.
Prioritize structure overlooks. You can customize it later.
4. Customizing The Appearance
As you chose a template as mentioned above, you will be directed to the first task of giving a name to your blog as well as a little tutorial about Squarespace's tools of editing.
Note that I have chosen Bailard as my template for this guide.
After that, let the party begin!
Firstly, you need to take a good look at the blog page in the editor. From there, you can take your decisions in your way regarding customization. However, for your ease, I have listed down the main tools and their role briefly.

1. Pages
On the left side of the screen, you can see several options given in a list with the editor. Pages are the first that you can see among them. This is what has been created for you to take control of each and every page of your blog. You can create new pages, delete, edit pages as you like.
Click "Pages". You can see the pages that are associated with your blog default. For instance, if we take the Main Navigation, you can see the pages that are linked in it. You can add pages if you want by clicking the plus icon on the top right corner.
According to your need, adding pages are split into different categories as shown below.


2. Design
This is the most important section which you need when customizing your blog. Fonts, Colors, Animations, Spacing, Buttons, Image Blocks, Browser Icon, Lock Screen, Checkout Page, 404 Page, Access Denied Screen, Social Sharing, Custom CSS are the key components that you can edit. Watch the above video to get an idea about customization.
,
5. Adding Comments
Squarespace comes with a simple comments section. However, if you want to increase engagements on your website and make great conversations, you can switch fully-featured commenting platform like Hyvor Talk.
Some advantages would be:
Your users will receive email notifications as soon as someone replies to their comments
Hyvor Talk is a network of 10,000+ users. Users can sign up once and publish a comment on any website that uses Hyvor Talk
Hyvor Talk also comes with a reaction plugin
Guest Commenting
Markdown Formattings
KaTeX (if you are using mathematics)
As Hyvor Talk has official integration for Squarespace, you will find adding comments just a piece of cake.
1. Signup at Hyvor Talk
First of all, visit Hyvor Talk landing page. After that click "Install Hyvor Talk". Then, you will be automatically redirected to the sign up page as shown below.

Fill in the spaces given appropriately and hit "Sign Up".
2. Adding Your Blog To The Console

After signing up, you will be in the Hyvor Talk Console. Then, go to Account -> Add Website. Type your blog's name and the domain of your blog in the spaces given as "Website Name" and "Website Domain" respectively. After that, click "Add". (See the image above)
3. Integrating Comments on Your Blog
Go to Moderate -> Installation and click in the Squarespace Icon as shown below.

After that, you will see a set of instructions given by the Console regarding installation. Just keep it aside for a moment.
Now let's move to the Squarespace again.
Turn off Squarespace default comments.
Go to your blog editor and click Pages on the top left side of your screen.

Then, you will see all the pages of your blog. Choose the page where you need to add comments. For instance, let's take the "Blog".

So, click the Settings -gear- icon. Then, you will see a pop-up window as shown below. From there, click "Advanced".

Next, click Post Blog Item Code Injection.

Now go to the Console which we kept aside for a moment. Copy the code given below the instructions.

Paste the copied code replacing YOUR_WEBSITE_ID with your actual website ID which can be found from the console’s general section.

Finally, click "Save". Yay! you did it!
6. Adding Analytics
As bloggers, you all expect high user engagement. So,it is better to track user performance from the beginning because it is helpful to take decision of improving your blog. Adding analytics is the best solution. Google Analytics is a good choice in this case.
Use Squarespace's built-in integration to connect your blog to Google Analytics for visitor tracking and other reporting.
To start, sign up a Google to have a Google Analytics account.
Find your tracking ID. To do that go toAdmin -> Property Settings -> Tracking ID in Google Analytics.
To add Google Analytics to your blog,
In the Home Menu, click Settings, and then click Advanced.
Click External API Keys.
In the Google Analytics Account Number field, enter your tracking ID for this site.
Conclusion
Squarespace is ideal for creating professional websites. It has the best quality designs and features on the market, and while it can take a little getting used to, the final results are worth your patience. In this guide, I hope that you got a clear idea of how to create a blog with Squarespace. I also hope that you are now familiar with Squarespace too. If you have any questions, suggestions, just drop down a comment below. Happy Blogging!


Comments