
This is a simple and quick guide on integrating Hyvor Talk commenting system on Memberstack applications using Single Sign-on. This allows your Memberstack users to comment via Hyvor Talk using their accounts.
No coding knowledge required
This uses Hyvor Talk's Single Sign-on feature, which is only available in the 14-day trial period or the business plan of Hyvor Talk.
This guide uses Memberstack 2.0
1. Setting up Hyvor Talk
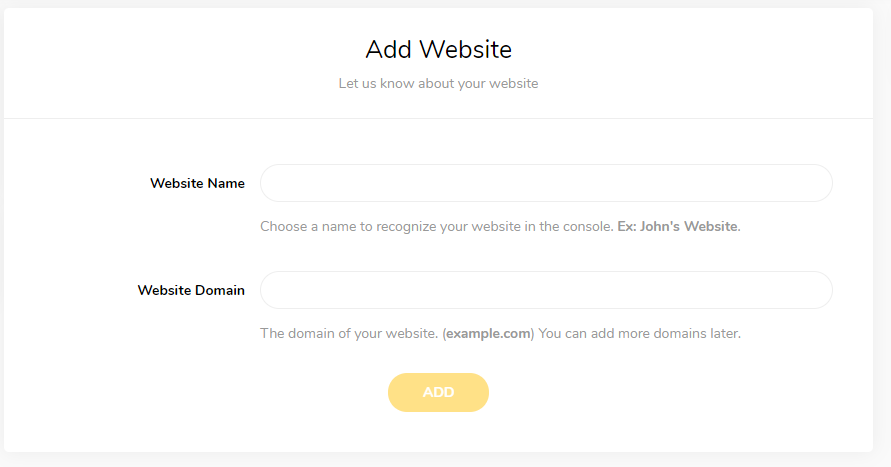
First, go to the Hyvor Talk console. You'll be asked to create a Hyvor account. After that, you will see the Add Website section. Here, fill in the data and register your website with Hyvor Talk.
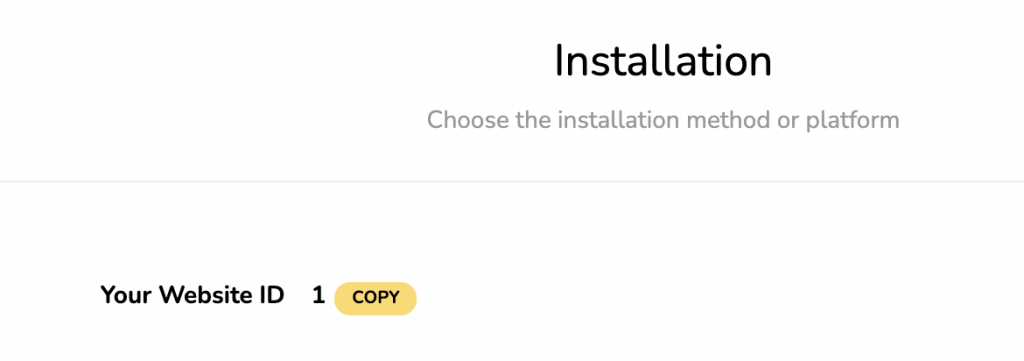
Now, you will see the installation section and your new Website ID. We will need this website ID in the last step.
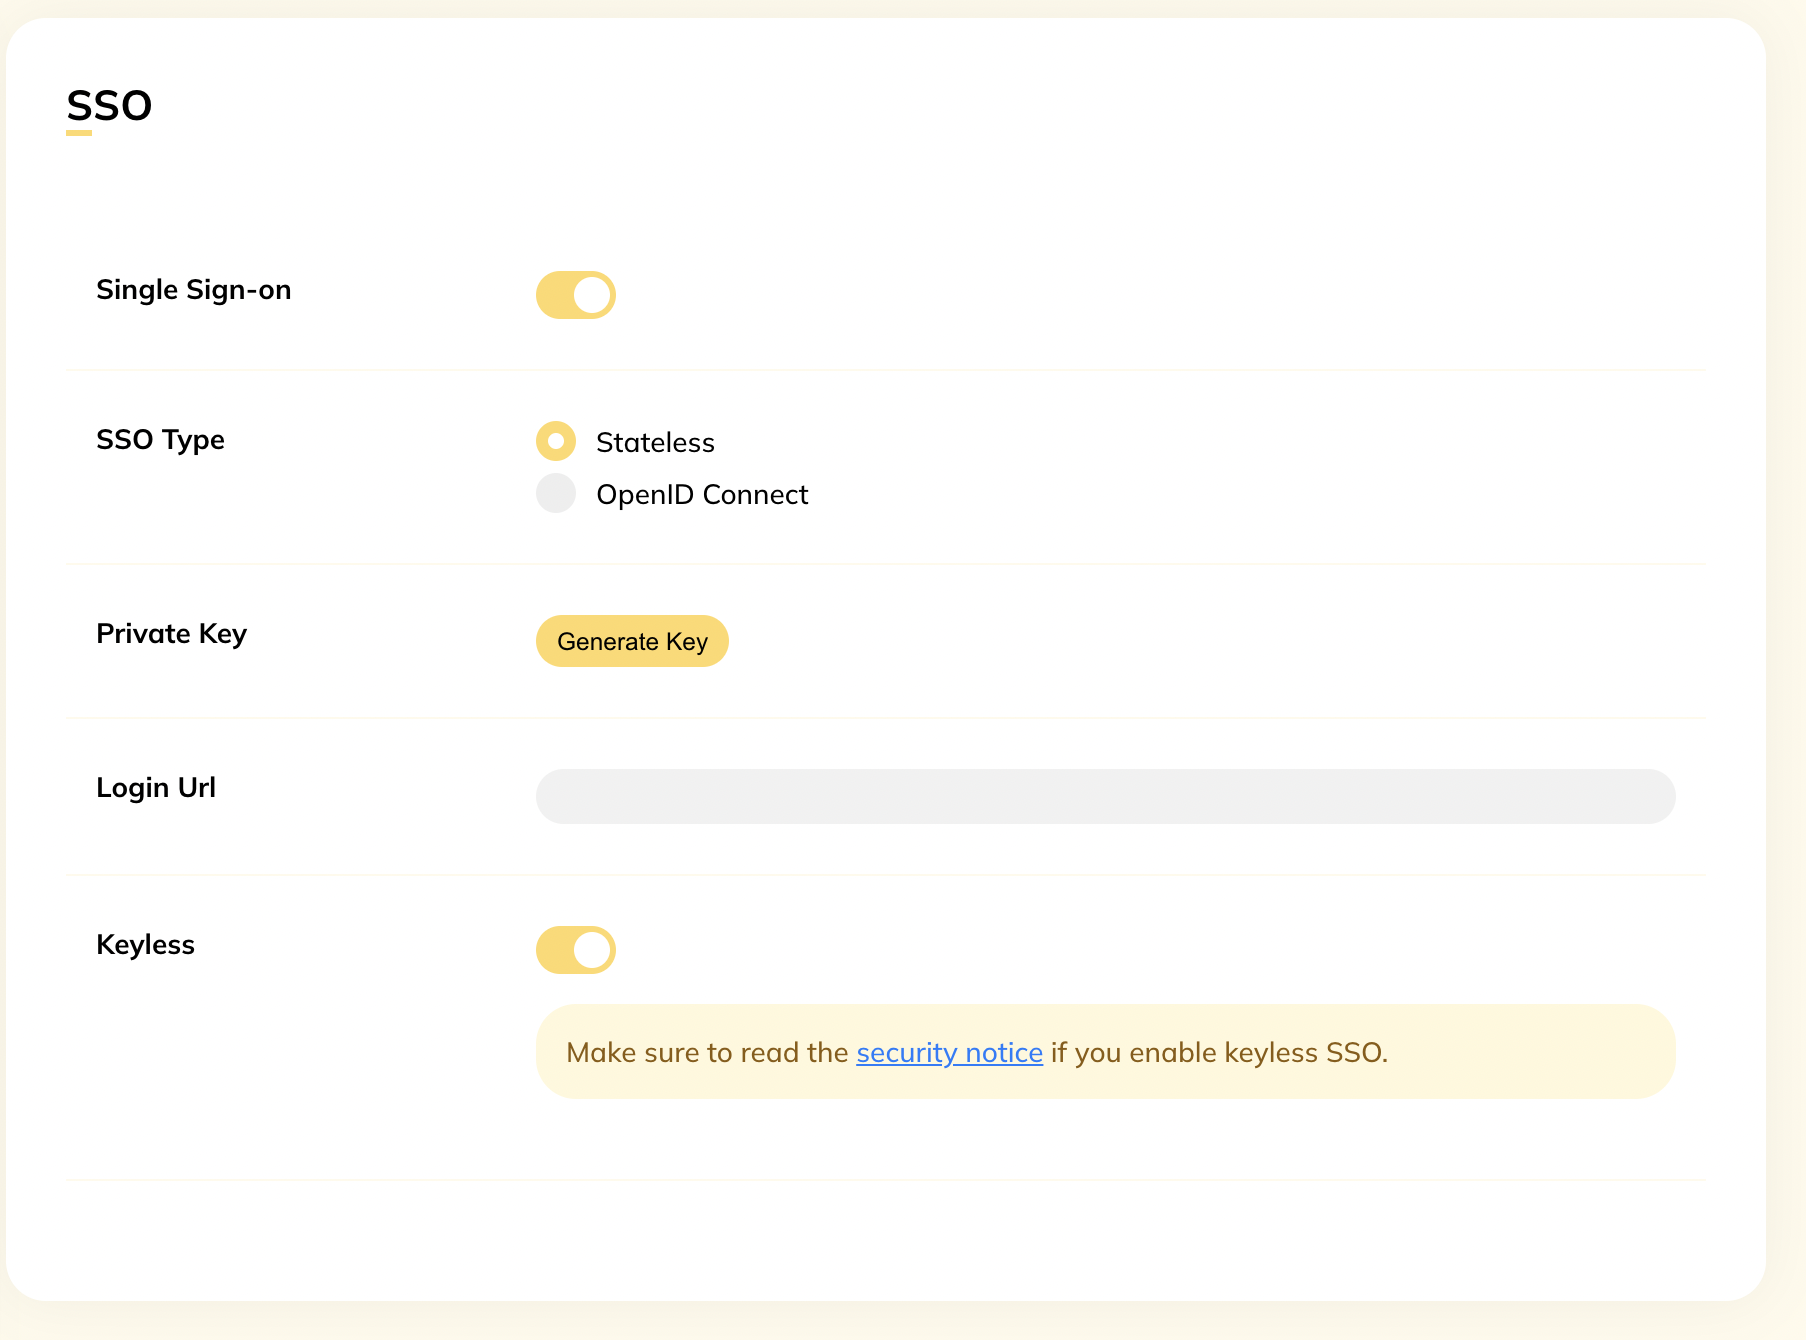
2. Setting up Single Sign-on
Next, go to Console -> Settings -> Single Sign-on
Turn on Single Sign-on
Set SSO Type to Stateless
Turn on the Keyless option
Set login URL to your login page URL
3. Installing Hyvor Talk and Connecting with Memberstack
Add this code to the place where you need the comments section to load.
1<div id="comments"></div> 2<script async src="https://talk.hyvor.com/embed/embed.js" type="module"></script> 3Make sure to replace YOUR_WEBSITE_ID (line 9) with your website ID from the last step.
Now, the Hyvor Talk comments section should appear on your website and will use Memberstack login. By default, there will also be a guest commenting option, which you can disable from the console if needed.
Using Custom Fields
The above code uses the part before @ of the user’s email as their username, as Memberstack does not support names natively. However, if you have set up custom fields, here’s an example of how to use them:
1comments.setAttribute('sso-user', btoa(JSON.stringify({ 2 timestamp: Math.floor(Date.now() / 1000), 3Conclusion
You have just completed setting up Hyvor Talk comments with Memberstack. Now, you can go through the console and change some appearance and community settings as needed. Hyvor Talk also supports an array of languages. You can also find more details in our documentation about customizing and moderating.
If you have any questions, comment below or contact us.


Comments